Define Warehouse Configuration File
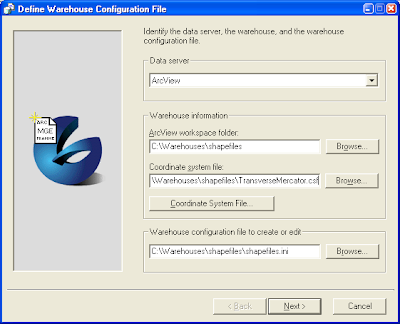
- On the Windows desktop, select Start | All Programs | GeoMedia | Utilities | Define Warehouse Configuration File.
The Define Warehouse Configuration File dialog box appears.
- In the Data server combo box, choose ArcView.
- In the Warehouse information group, click Browse and select the ArcView workspace folder where you have stored your shape files, e.g. C:\Warehouses\ShapeFiles\.
- If you have an existing Coordinate System file, click Browse and select your existing coordinate system file, e.g. C:\Warehouses\ShapeFiles\TransverseMercator.csf.
If you do not have a coordinate system file, click Coordinate System File and define a new coordinate system file appropriate for your shape files in the Coordinate System Properties dialog box as shown below.

The Define Warehouse Configuration File dialog box may look like the screen below.

- In the Define Warehouse Configuration File dialog box, click Next.
The Define Warehouse Configuration File keywords are displayed.

- Click Finish.
The warehouse configuration file is created.
Connecting to a Shape Files Warehouse
- In GeoMedia, select Warehouse | New Connection.
The New Connection dialog box appears.
- In the Connection type list, select ArcView.
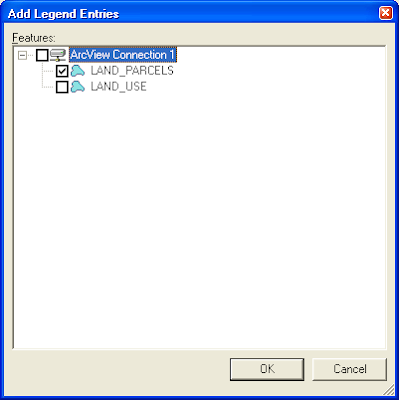
- In the Connection name field, type in a suitable connection name, e.g. ArcView Connection 1.
- In the Connection description fields, type in a suitable description (this is optional), e.g. My Shape Files Connection.
- In the ArcView workspace folder fields, click Browse and select the folder containing the shape files, e.g. C:\Warehouses\ShapeFiles\.
The New Connection dialog box may look like the screen below.

- Click OK.
GeoMedia is now connected to the shape files warehouse.


Accessing Shape Files in GeoMedia
 Reviewed by GIS
on
8:35:00 AM
Rating:
 Reviewed by GIS
on
8:35:00 AM
Rating:


